
How to Add a Blog Post to Your WordPress Website
How to Add a Blog Post to Your WordPress Website
Follow these simple steps to publish a new blog post on your WordPress site. This guide is perfect for beginners and anyone wanting a visual walkthrough.
Step 1: Log in to Your WordPress Dashboard
-
Open your browser and go to your WordPress login page.
-
Enter your username and password, then click "Log In."
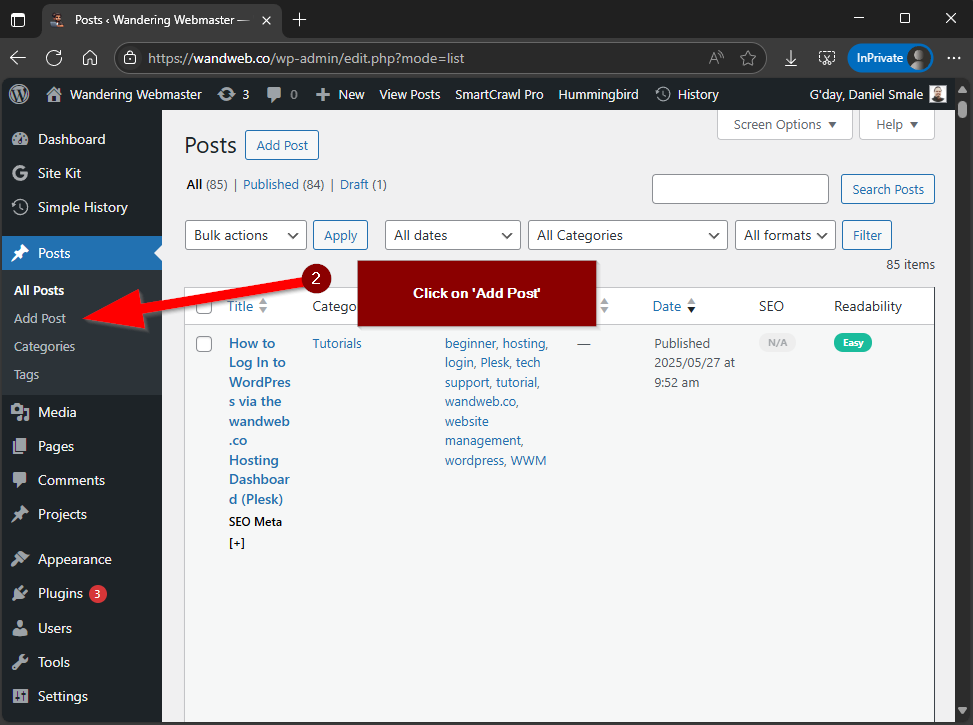
Step 2: Navigate to Posts
-
In the left-hand menu, click on Posts.

Step 3: Click 'Add Post'
-
Under the Posts menu, click Add Post to start a new blog entry.
Step 4: Add Your Content
-
Enter your post title in the "Add title" field.
-
Write your blog content in the main editor area.
-
You can use formatting tools, add headings, lists, and more for better readability.
-
To add images or media, click the Add Media button and upload or select files from your Media Library.
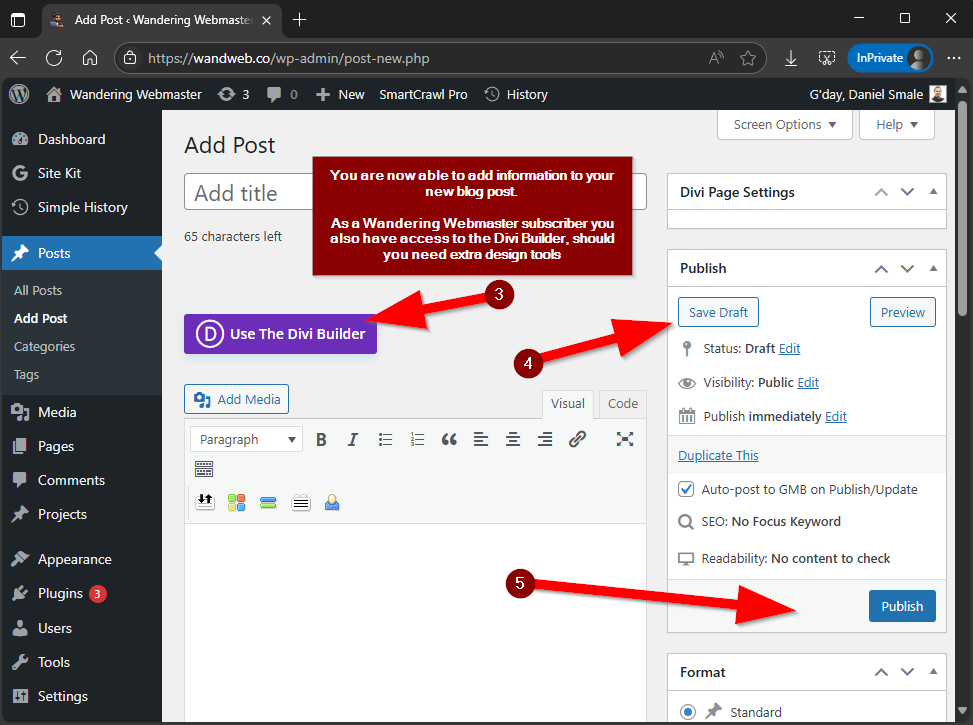
Step 5: Use the Divi Builder (Optional)
-
If you’re a Wandering Webmaster subscriber, you can use the Divi Builder for advanced design features by clicking the purple button (3)
Step 6: Save, Preview, or Publish
-
Click Save Draft to save your work without publishing (4)
-
Click Preview to see how your post will look live (4)
-
When you’re ready, click Publish to make your post visible to your audience (5)
Tips
-
Use categories and tags to organise your posts and help readers find related content.
-
Add a featured image to make your post stand out on your blog page.
-
Preview your post before publishing to catch any errors or formatting issues.
You’ve just published a new blog post on your WordPress website! For more help, reach out to WWM support on Discord for instant assistance and community tips.